
Areas
Every area of every region: its monsters and their levels, what opens it and what clearing it gives.
Area categories




All areas




















































Regions
The world has 10 regions, each with its own monster species and 8 areas. Slime Village is open from the start, and each other region opens when the Cartographer in town reaches a level, as the table below shows.
| Slime Village | From the start |
| Magicslime City | 5 |
| Spider Maze | 10 |
| Bat Cave | 20 |
| Fairy Garden | 30 |
| Fox Shrine | 45 |
| Devilfish Lake | 55 |
| Treant Darkforest | 65 |
| Flametiger Volcano | 75 |
| Unicorn Island | 85 |
Waves and clears
An area is cleared by beating 10 waves of monsters. Each monster gets a random level between the lowest and highest an area lists. You have an hour to clear it.
Every clear pays out the area’s clear rewards, its town materials and any others, so farming one area keeps them coming. Clearing an area pays no experience or gold of its own, unlike a dungeon: those come from the monsters you defeat.
Most areas open once you’ve cleared an earlier area of the same region a number of times, shown on each area’s page.
Monster colours
Every area has a monster rarity, and each monster that spawns rolls its colour from that rarity’s odds, in the table below. A wave can also name a colour of its own, like the Purple waves of the last areas.
What each colour is worth is on the Monsters page.
| Normal | 100% | — | — | — | — | — | — |
| Common | 50% | 30% | 20% | — | — | — | — |
| Uncommon | — | 40% | 30% | 20% | 10% | — | — |
| Rare | — | — | — | 20% | 35% | 35% | — |
| Boss | — | — | — | — | — | — | 100% |
Unique equipment
Each area has one piece of unique equipment, and every monster you defeat there has a 0.001% chance to drop it. That chance grows with the area’s difficulty, as the table below shows: twice as high at difficulty 1, three times at difficulty 2, and so on. Difficulty goes up to 9 at first, and to 19 once Tier 3 World Ascension opens more. Dungeons have no unique equipment.
| 0 | 0.001% |
| 1 | 0.002% |
| 2 | 0.003% |
| 3 | 0.004% |
| 4 | 0.005% |
| 5 | 0.006% |
| 6 | 0.007% |
| 7 | 0.008% |
| 8 | 0.009% |
| 9 | 0.01% |
| 19 | 0.02% |
Difficulty and area prestige
Raising an area’s difficulty adds 20 waves for each level, which area prestige can bring back down.
Area prestige stays locked until you’ve done a Tier 1 World Ascension once. After that, each area and dungeon earns its own prestige points as its clears pass milestones: an area’s 1st at 500 clears, its 2nd at 1,500 and its 3rd at 3,000. A dungeon gets there far sooner: at 10, 30 and 60 clears.
An area spends its points on six upgrades:
- Area Prestige: raises the highest difficulty you can pick.
- Mission Challenger: opens more of the area’s missions.
- Explorer’s Boon: multiplies how many clears each clear counts for, and its rewards.
- A Moment to Breathe: takes waves off, down to no fewer than 10.
- EXP Bonus and Move Speed Bonus: help anywhere in the area’s region.
Missions and milestones
Every area has the same 5 missions at each of its 20 difficulty levels, each cleared once. Only the first 2 are open at first; the area’s Mission Challenger prestige upgrade opens one more for each of its 3 levels, at 3 prestige points a level. That’s 8,000 missions across the game’s 80 areas.
The first time you ever clear a mission it pays Epic Coins: the Area missions table’s amount at difficulty 0, and 5 more for each difficulty level. Every area mission you’ve ever cleared counts toward the milestones below, so a World Ascension doesn’t take them back.
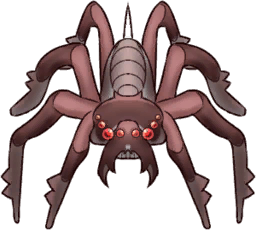
Two pets help: with the Boss Spider pet active, an area cleared in a second or less clears every open mission there you’ve cleared before, whatever its goal; with the Red Flametiger pet, a mission you clear is cleared at every lower difficulty too.
| Mission 1 | Clear this area when your HP is more than 90% | 10 |
| Mission 2 | Clear this area within 10 sec | 20 |
| Mission 3 | Clear this area without any Equipment | 30 |
| Mission 4 | Clear this area with only Base Attack skill equipped | 40 |
| Mission 5 | Clear this area within 3 sec | 50 |
| 5 | EXP Gain + 20% |
| 10 | Equipment Proficiency Gain + 10% |
| 15 | Town Material Gain + 50% |
| 20 | Equipment Inventory Slot + 10 |
| 25 | EXP Gain + 30% |
| 30 | Gold Cap + 50% |
| 35 | Equipment Proficiency Gain + 20% |
| 40 | Mysterious Water Gain + 50% |
| 45 | Equipment Inventory Slot + 10 |
| 50 | Town Material Gain + 50% |
| 55 | Upgrade Queue + 10 |
| 60 | Resource Gain + 100% |
| 70 | Gold Gain + 50% |
| 80 | EXP Gain + 50% |
| 90 | Multiply Rare Material Drop Chance by 150% |
| 100 | Global Skill Slot + 1 |
| 110 | Upgrade Queue + 10 |
| 120 | Expedition EXP Gain + 100% |
| 140 | Alchemy Point Gain + 100% |
| 160 | Expedition Reward Amount + 25% |
| 180 | Resource Gain + 1,000% |
| 200 | Reduces General Upgrades’ cost by 25% |
| 220 | Enchant Inventory Slot + 10 |
| 240 | Equipment Loadout Slot + 1 |
| 260 | Skill Proficiency Gain + 100% |
| 280 | Upgrade Queue + 10 |
| 300 | Gold Cap + 100% |
| 325 | Gold Gain + 100% |
| 350 | Slime Coin Gain + 25% |
| 375 | Enchant Inventory Slot + 10 |
| 400 | Blessing's effect + 100% |
| 425 | Active Pet Slot + 5 |
| 450 | Catalyst Level Cap + 25 |
| 475 | Resource Gain + 50,000% |
| 500 | Skill Loadout Slot + 1 |
| 525 | Enchant Inventory Slot + 10 |
| 550 | Town Building Level + 10 |
| 575 | Upgrade Queue + 10 |
| 600 | Improves Resource Gain upgrades effect |
| 650 | Gold Cap + 500% |
| 700 | Reduces the incremented cost per Lv of Resource Gain upgrades by 10% |
| 750 | Pet Loyalty Cap + 100 |
| 800 | Upgrade/Alchemy Queue persists on World Ascension |
| 850 | Active Pet Slot + 5 |
| 900 | Pet Rank Cap + 50 |
| 950 | Reduces General Upgrades’ cost by 50% |
| 1,000 | Skill Rank persists at Rank 1 on World Ascension |
| 1,050 | Active/Passive Heroes setup in Guild tab persist on World Ascension |
| 1,100 | Mysterious Water Cap persist on World Ascension minus missing upgrades |
| 1,150 | Unlocks Essence Allocation Save/Load in Lab (Requires Tier 1 World Ascension accomplishment #30) |
Swarms
Once your guild reaches level 10, every 35 minutes of play there’s a 50% chance a swarm starts in a random area you’ve opened. It comes in three sizes: Regular (85% of swarms), Large (13%) and Epic (2%). While it lasts, every wave spawns extra monsters: three times as many in a Regular swarm, four in a Large and five in an Epic.
Each of those extra monsters has a 0.025% chance to be a mutant, more at a higher difficulty: 0.05% at difficulty 1, 0.075% at difficulty 2, and so on. A mutant looks like any other of its colour, but drawn 1.5 times as big and marked Mutant: it has 5 times the HP, twice the ATK, MATK, DEF and MDEF, and gives twice the experience and gold, and twice the chance at its materials.
To beat a swarm, clear its area 50 times in a Regular swarm, 150 in a Large or 300 in an Epic, within 30 minutes; if time runs out first, it just ends. Its score grows as you go: one more than the area’s difficulty for each clear, 10 for each mutant you defeat, and 10 for each whole minute left when you beat it. Beating it always gives the talisman of the area’s species, one more for each size up, and the score unlocks the rest of the rewards in the table below.
| 100 or more | EXP Gain Blessing for 15 minutes |
| 200 or more | The area’s town material: 50 clears’ worth |
| 300 or more | 5 talisman fragments |
| 400 or more | Gold Gain Blessing for 15 minutes |
| 500 or more | 5 Portal Orbs |
| 750 or more | Extract Scroll |
| 1,000 or more | Your hero’s own badge talisman |
| 1,500 or more | Level Up Scroll |
| 2,000 or more | Enchanted Alembic |
| 2,500 or more | Level Max Scroll |
| 3,000 or more | Tracker's Map |